
How to convert overtime bank balance into leave
Written by Nutcache Team
Updated
In your system, Admins+ have the flexibility to define how overtime bank balances are converted into leave. This can be done either manually or automatically, depending on your preferences.
Manual conversion
Follow these steps to manually convert an employee’s overtime bank balance into leave:
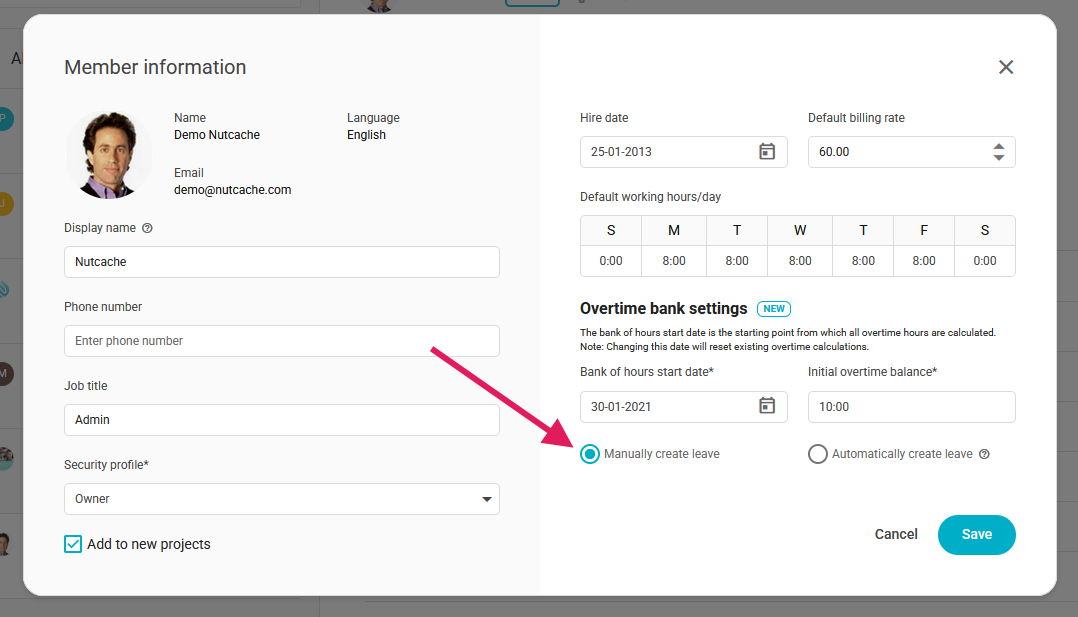
Enable manual conversion in the Member profile
Navigate to the member’s profile and set the overtime bank usage to manual.
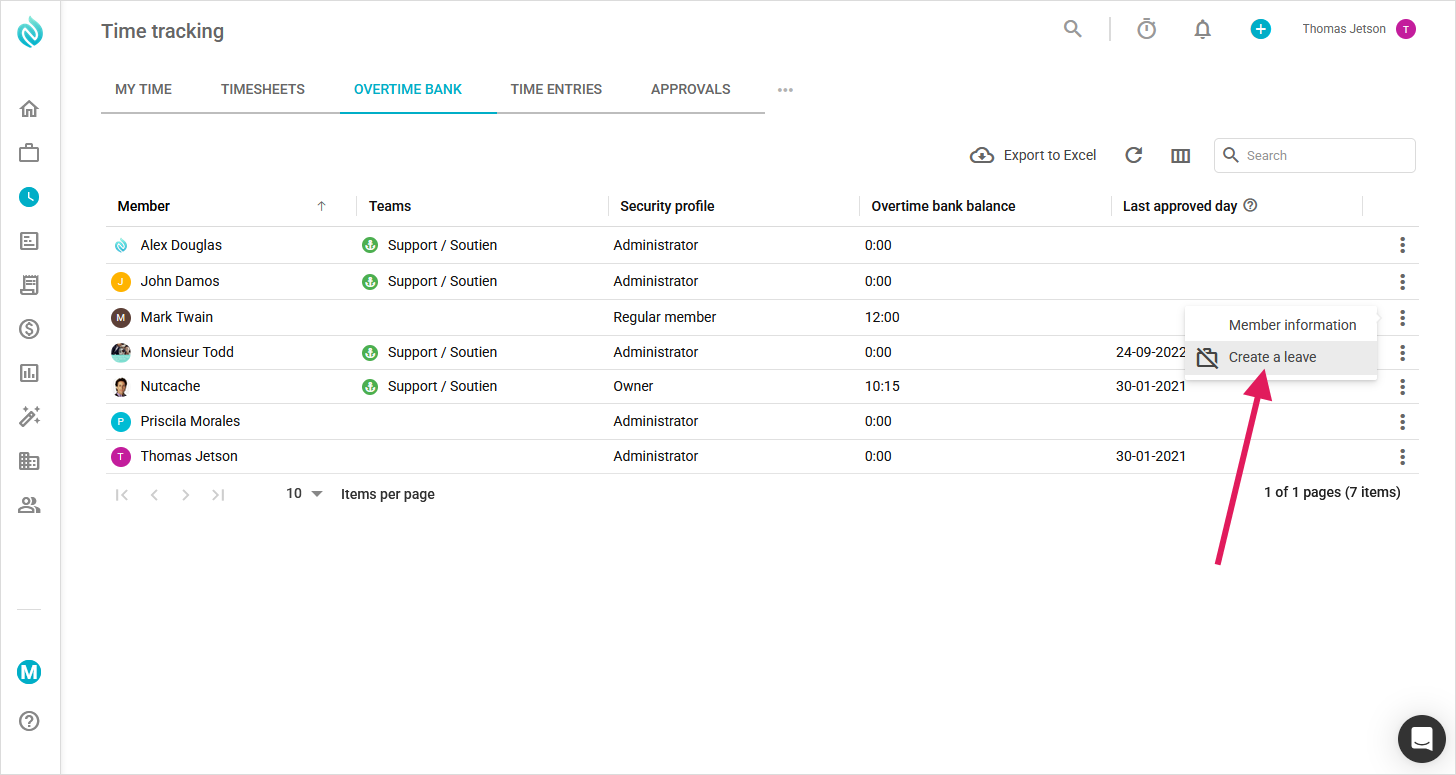
Access the overtime bank grid
Go to the overtime bank grid. Click the three-dot menu next to the relevant member's row and select Create leave.
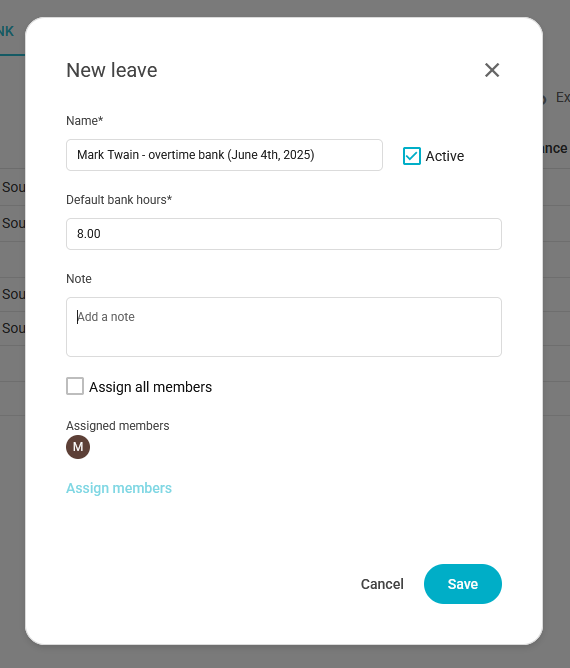
Complete the leave creation form
A pop-up window will appear with:The selected member pre-filled
A default name for the leave (which can be edited)
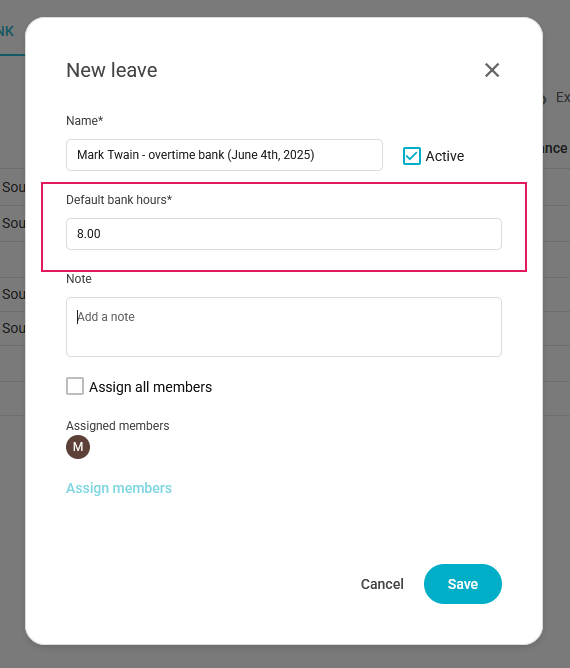
Set the leave amount
Enter the number of hours or days you want to convert in the Leave bank amount field, then click Save.
Confirmation
A confirmation message will appear. The member’s overtime bank balance will be updated, and the new leave will be created and assigned to their profile.
Automatic conversion
To automatically convert overtime hours into leave:
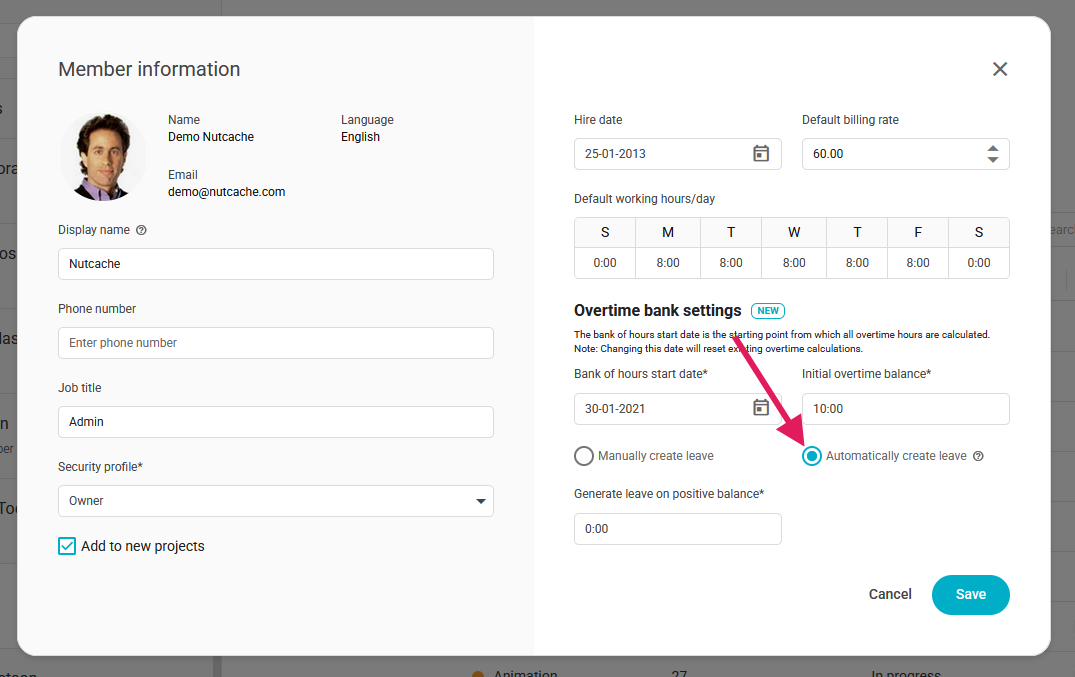
Enable automatic conversion in the Member profile
In the member’s profile, set the overtime bank usage to automatic.
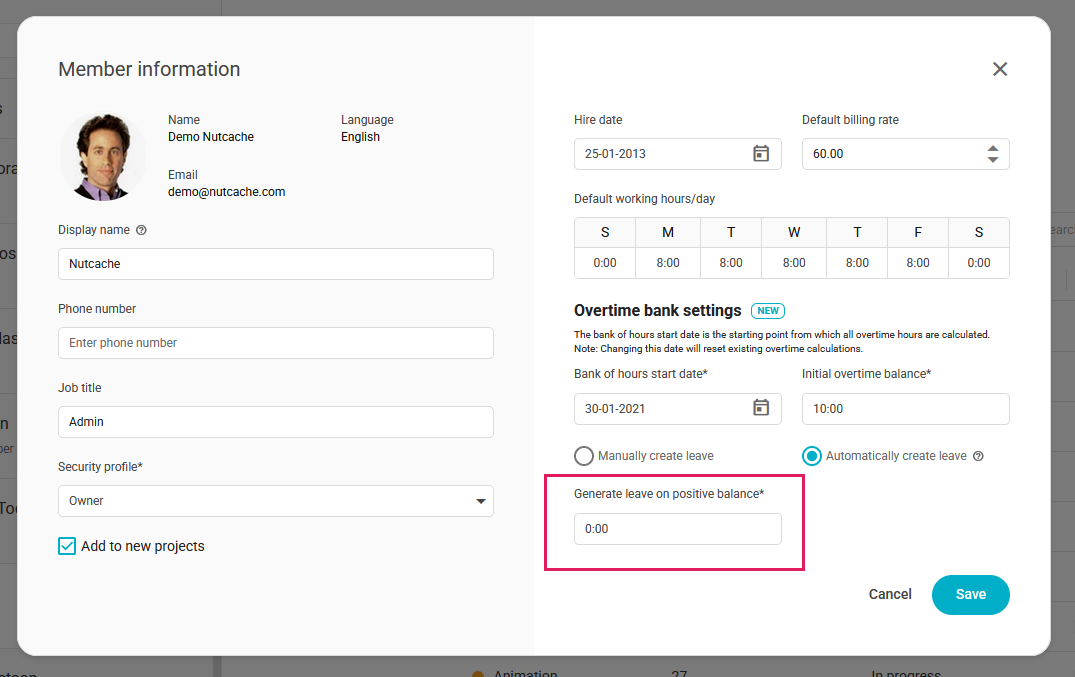
Set the conversion threshold
Define the threshold value (in hours or days) that should trigger automatic leave creation.
Automatic process
Whenever a new timesheet is approved for the member:Their overtime bank balance is updated
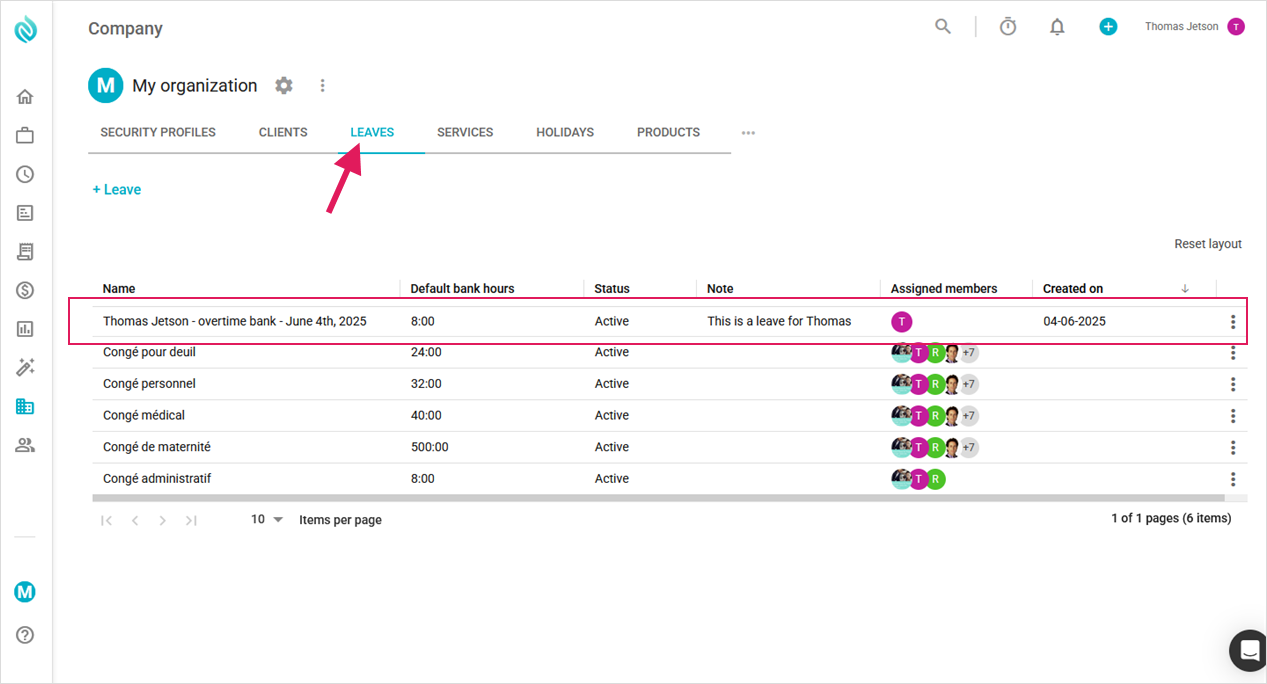
If the balance reaches the defined threshold, a new leave is automatically created
The new leave will be visible under the Leaves tab
Need a hand?
Our team can help you find the answer.
Contact us