
How to invoice by task - Settings
Written by Nutcache Team
Updated
Goal
This feature provides a new invoicing method based on tasks progress. It enables our users to define for every billable task and every expense category an amount that will be used as the project goes.
The tasks used amounts can be automatically calculated, based on the logged time and the project phase billing method (chosen among the classic ones offered by Nutcache, such as member rate, service rate, etc…) it belongs to, or they can be manually entered directly in the invoice.
The expense categories used amounts can be automatically calculated thanks to the entered expenses or manually entered as well.
As the project is being invoiced, the new invoices will keep the project consistency by displaying the previously billed amounts.
💡 This new feature offers a new progressive invoicing method thanks to which the invoices layout is more consistent. It is mainly designed for the architects and engineers but could also interest any other kind of professional who would like to ensure a clean and understandable invoicing process through their projects.
Who can use this feature?
Users with an Enterprise plan.
Users with the Project Manager role or higher.
How to use it?
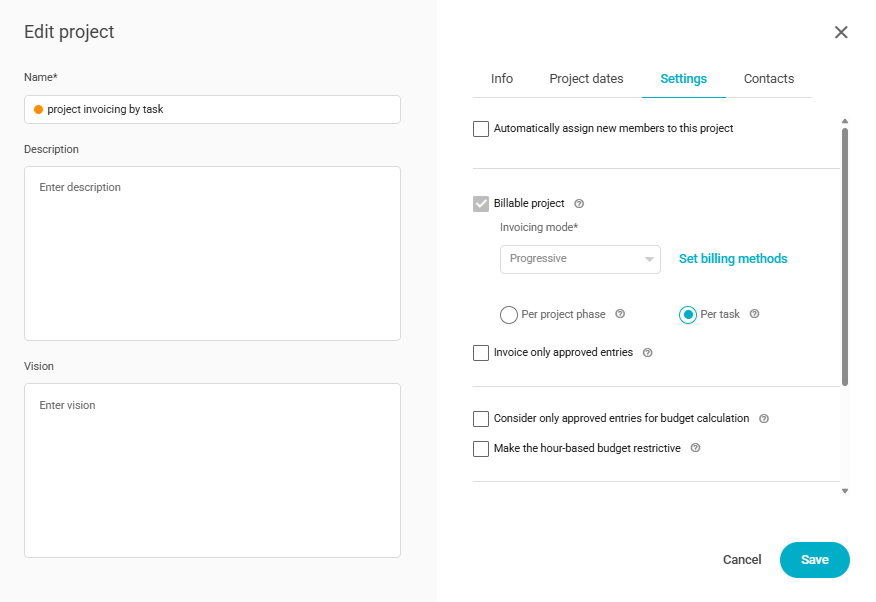
Create a billable and progressive project. Select the new billing method: Per task
Once the project is created, create the project phases and the tasks they contain.
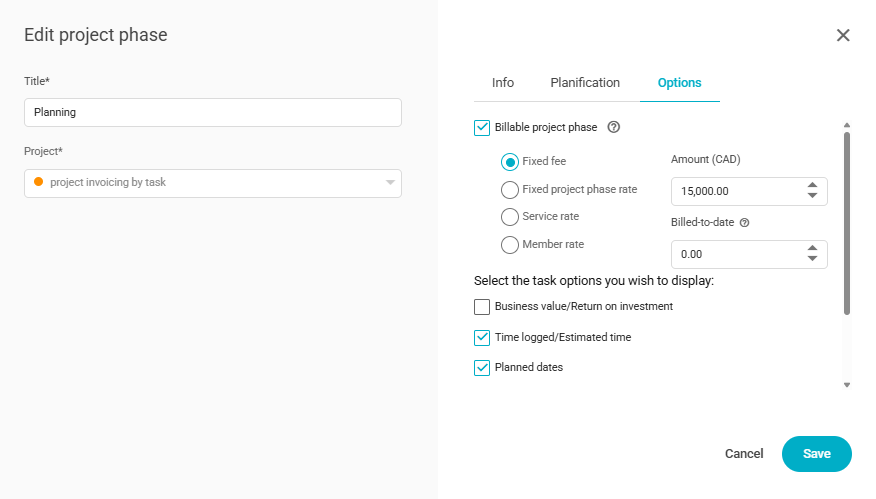
The project phase invoicing settings can be defined directly in the project phase pop-ups:
Or through the global set billing methods pop-up:
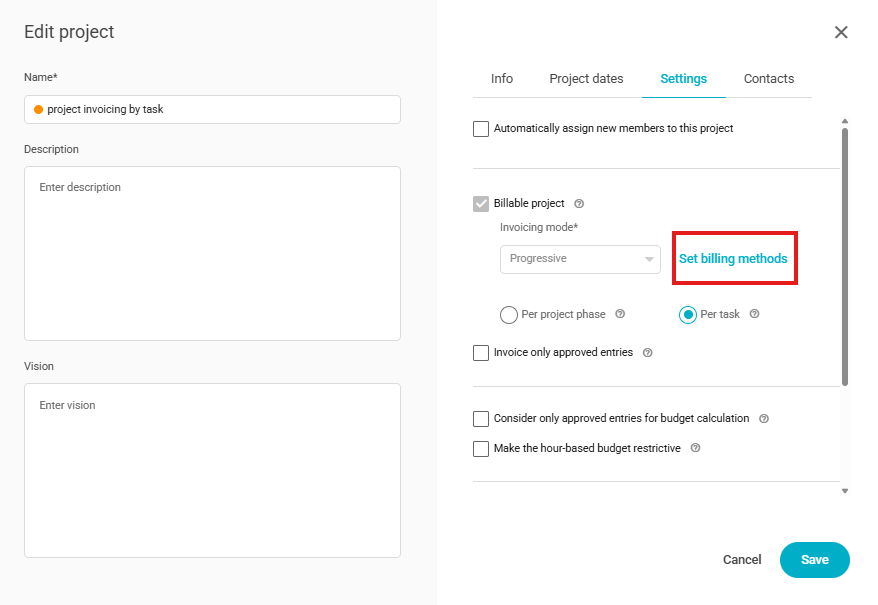
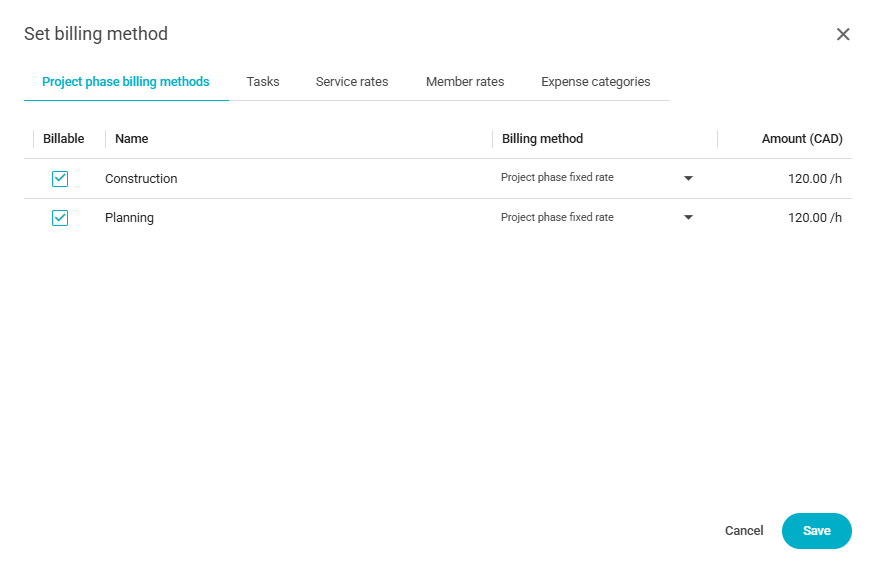
Let’s be concise: What should you define in your project?
👉 Projects phases:
Specify if it is billable or not;
If billable, which billing method do you want to apply to all the billable tasks belonging to this project phase?
If billable, the corresponding amounts:
Project phase is a fixed-fee: the fee will be calculated by adding the budget of each task;
Project phase has a fixed hourly rate: define this rate;
Project phase is either based on member rates or service rates: use the corresponding tab to define these amounts;
👉 Tasks:
Billable or not?
If billable, define the task amount/budget;
👉 Expense categories:
Define the corresponding amount;
You don’t have to specify if the expense category is billable or not. The calculations will consider if the expenses, directly, are billable or not.
💡 If the project has started without being initially set up in Nutcache, don’t panic! You can still enter the previously billed amounts during the project creation. Just don’t forget to define these amounts before actually invoicing your project with Nutcache.
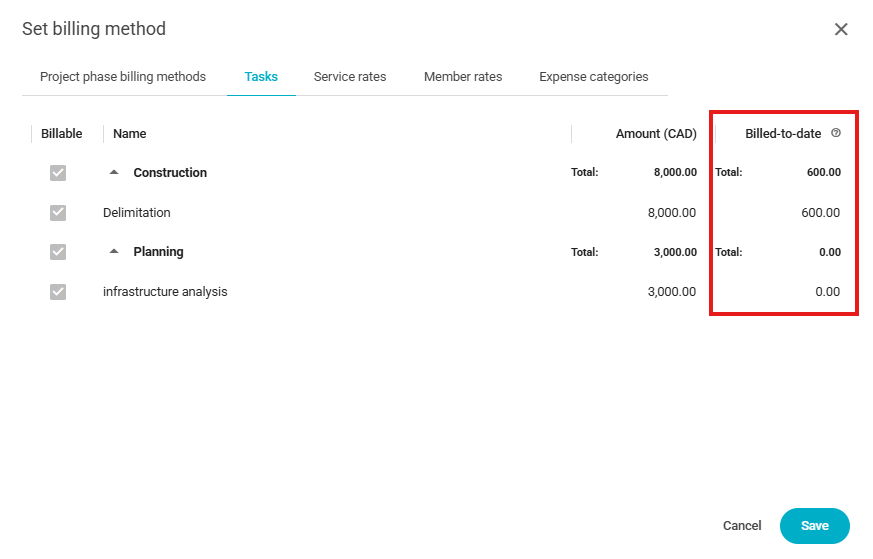
Once your project is set, run it as usual! Enter time entries and expenses as it goes.
💡 Keep in mind that, as the billing method is task based, you have to specify the related task for each billable time entry in order to let us ensure the right amounts are properly considered.
Now it is time to get paid! Best part, right? Invoice your project as you usually do (several entry points are accessible):
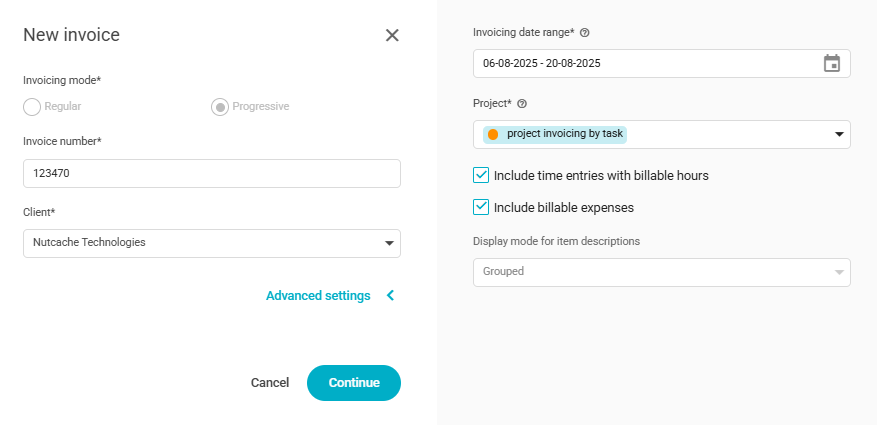
Your invoice is automatically populated based on the logged time, the entered expenses and the invoicing date range you specified:
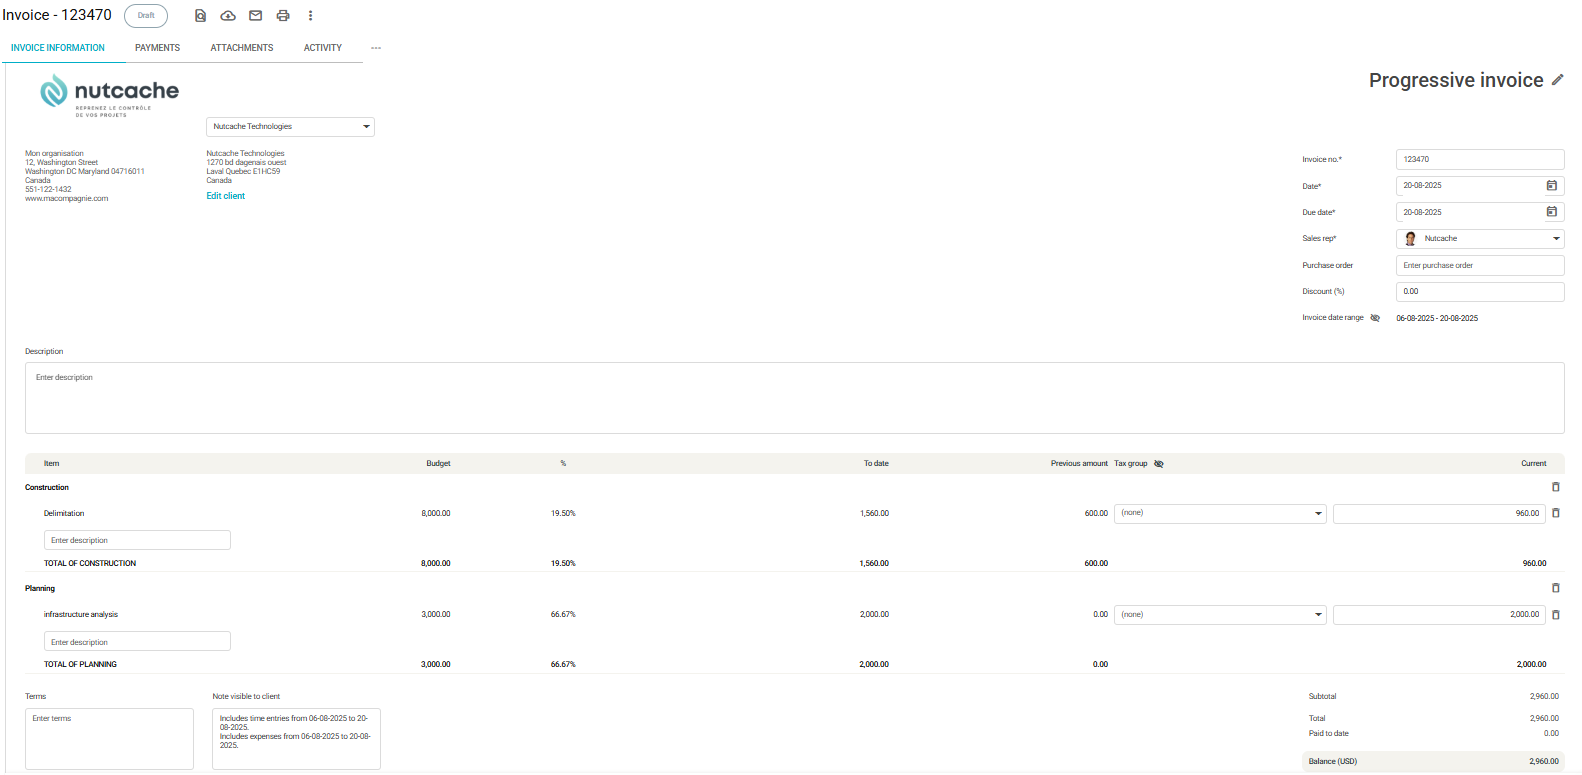
You can also manually adjust the layout or the amounts:
Leave the “Not created” status and, once your invoice is ready, use the preview to get a clear idea of what it will look like!
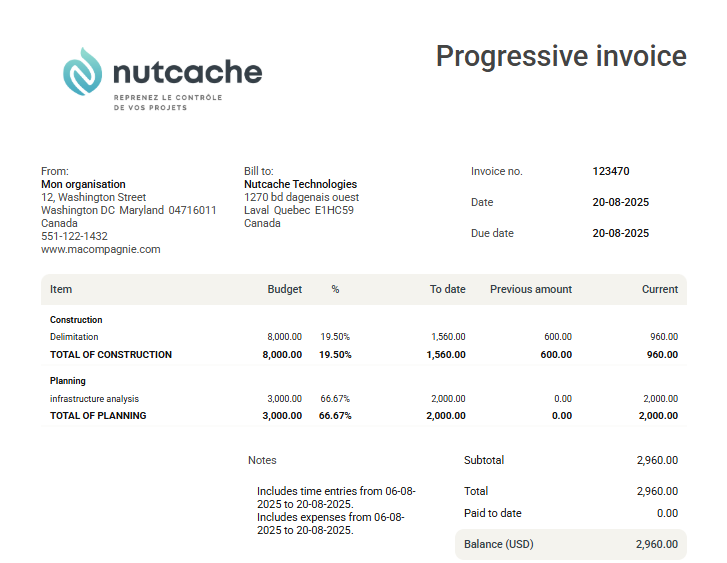
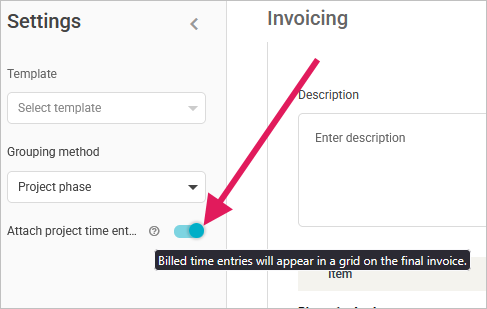
💡 More details are needed? You can decide to attach the time entries grid corresponding to the billed items in your invoice.
Satisfied with the result? Send the invoice to your clients to get paid!
Continue to work on your project, enter the new time entries and the expenses and generate a new invoice. The progressive calculations will show the progress as your project goes.
Further reading:
How to invoice by task
Need a hand?
Our team can help you find the answer.
Contact us